Building serverless Telegram bot with Kotlin, Google Cloud Functions and Firebase Realtime Database
Introduction
Firebase Realtime Database is a NoSQL cloud storage with built-in ability to perform CRUD operations using REST API. It is easy to setup and has a free pricing tier which makes it a good choice for small projects. Google Cloud Functions is a FaaS (Function-as-a-Service) solution that allows you to deploy snippets of code in the cloud and run them in response to various events, without having to provision and configure servers by yourself. In this tutorial we are going to use Realtime Database together with Google Cloud Function written in Kotlin to build a simple chat bot that can be used to track user daily expenses. We will also use Google Secret Manager to store the sensitive configuration data and expose it to the Cloud Function instance.

Prerequisites:
- Google Cloud account with active billing account (All cloud resources used in this tutorial have free pricing tiers, however some of them, like Cloud Functions cannot be used without enabling billing)
- Google Cloud SDK —
gcloudcommand line tool is used to create and manage cloud resources - Firebase CLI — Command line tool to manage Firebase resources
- Kotlin 1.5.21
- Gradle — Used to build and run function locally
Creating Telegram bot
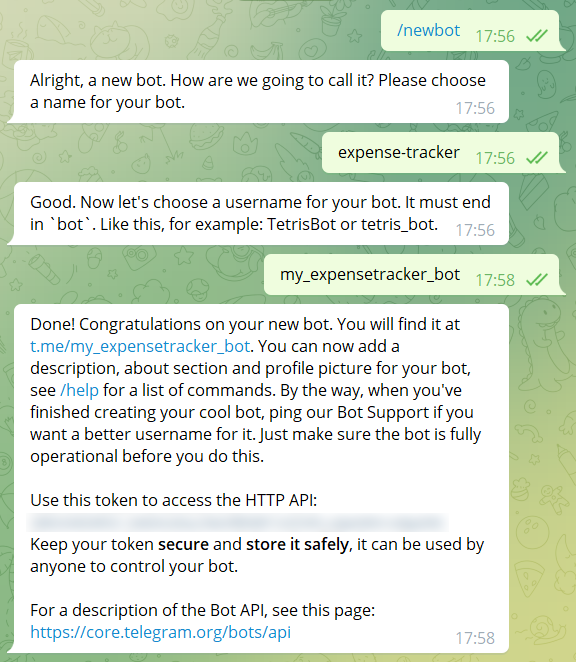
We’ll start from creating a new Telegram bot using BotFather. Just follow the bot instructions, select a name and username for the bot and receive the API token at the end. Save the token locally in bot-token.txt file.
Initializing cloud resources
We use Google Cloud SDK command line tool to create and configure necessary cloud resources. (The same results can be achieved using Google Cloud console in browser, however this tutorial focuses on the usage of command line).
First, login to you Google account:
gcloud auth login --update-adc
Then create new Google Cloud project. Projects serve as directories to group other resources together.
gcloud projects create --name="Expense Tracker"
The command above will ask you to confirm the generated project ID (in my case it was expense-tracker-330011). It is a unique identifier of your project that can’t be changed after a project was created. If you don’t want the ID to be generated for you, you can specify it in the command like this:
gcloud projects create [project-id] --name="Expense Tracker"
After successfully creating project, save project ID in the environment variable for future use:
export GCLOUD_PROJECT_ID=[your project id]
Now we also need to link a billing account to new project since some of the services we’re using (Secret Manager and Cloud Functions) cannot be enabled for a project without a billing account. With the following command you can see the list of your billing accounts.
gcloud beta billing accounts list
If you don’t have any billing account set up, follow this tutorial. Copy ACCOUNT_ID field of one of the accounts and use the following command to link it with your Google Cloud project:
gcloud beta billing projects link $GCLOUD_PROJECT_ID --billing-account [account-id]
With linked billing account we can enable Google Cloud services that will be used by the application:
gcloud services enable --project=$GCLOUD_PROJECT_ID \
    secretmanager.googleapis.com \
    firebasedatabase.googleapis.com \
    cloudfunctions.googleapis.com \
    cloudbuild.googleapis.com
Creating secret
Next, let’s create a new secret that will hold Telegram bot token. Secrets are resources designed to store sensitive data like passwords and various API keys.
gcloud secrets create --project=$GCLOUD_PROJECT_ID \
telegram-bot-token --replication-policy="automatic"gcloud secrets versions add --project=$GCLOUD_PROJECT_ID \
telegram-bot-token --data-file="bot-token.txt"
bot-token.txt is the name of the file where Telegram API key was saved.
Creating Service Account
Next step is to create service account for Google Cloud Functions instance. Service accounts are resources that are used by applications to perform authorized API calls to other cloud resources. In our case service account used by cloud function instance needs permissions to access and manage data stored in Firebase Realtime Database as well as read secrets content. The following command will create a new service account named expense-tracker-sa:
gcloud iam service-accounts create expense-tracker-sa \
--project="$GCLOUD_PROJECT_ID" \
--display-name="expense-tracker-sa" \
--description="Expense tracker Cloud Function service account"
Service accounts are uniquely identified by email address with the following format: [service-account-name]@[project-id].iam.gserviceaccount.com
Save service account email in the variable for later use:
export SERVICE_ACCOUNT_EMAIL=expense-tracker-sa@${GCLOUD_PROJECT_ID}.iam.gserviceaccount.com
After that all you need to do is to give this service account necessary permissions by assigning IAM roles. It is important to use service accounts with the least possible amount of permissions required to perform the necessary tasks.
gcloud projects add-iam-policy-binding $GCLOUD_PROJECT_ID \
--member="serviceAccount:${SERVICE_ACCOUNT_EMAIL}" \
--role="roles/firebasedatabase.admin"gcloud projects add-iam-policy-binding $GCLOUD_PROJECT_ID \
--member="serviceAccount:${SERVICE_ACCOUNT_EMAIL}" \
--role="roles/secretmanager.secretAccessor"
roles/firebasedatabase.admin role allows service account to perform both read and write operations on the database, while roles/secretmanager.secretAccessor grants read access to secret values
Initializing Firebase
In the next step we will enable Firebase for our Google Cloud project and initialize Realtime Database instance. This can be done via Firebase CLI. Run the following commands in the shell (assuming you have Firebase CLI installed):
firebase login
firebase projects:addfirebase $GCLOUD_PROJECT_ID
firebase init database
When running firebase init database command, select the option Use an existing project , then select your project ID from the list. After that confirm that you want to initialize Realtime Database in your project and choose the region for the database instance.
To verify that all steps were successful, you can run the following command: firebase database:instances:list --project $GCLOUD_PROJECT_ID. The output should show that you have one Realtime Database instance (see example below).

Each Realtime Database instance has it’s unique reference URL which is used to communicate with the database. The URL may have one of 2 possible formats:
https://[database-name].firebaseio.com/
(in case you selected us-central1 region), or
https://[database-name].[region].firebasedatabase.app/
(for all other regions), where [database-name] is the name that is returned by firebase database:instances:list command (in my case it’s expense-tracker-330011-default-rtdb). Save database reference URL in another environment variable:
export FIREBASE_URL=[your database url]
Implementing Cloud Function
Now it’s finally time to write some code! In this tutorial we organize the code in a Gradle project, however this is not a strict requirement for using Cloud Functions. The complete codebase can be found here. Let’s have a look at build.gradle file which contains dependencies and build scripts for the project:
runFunction task can be used to launch an instance of cloud function locally. This is useful to test the logic without deploying the function to the cloud.
FirebaseRepository class is responsible for database operations. URL of Realtime Database instance is taken from FIREBASE_URL environment variable. During class initialization, GoogleCredentials object is created which is then used obtain the value for access_token query param that should be passed with every request to the database.
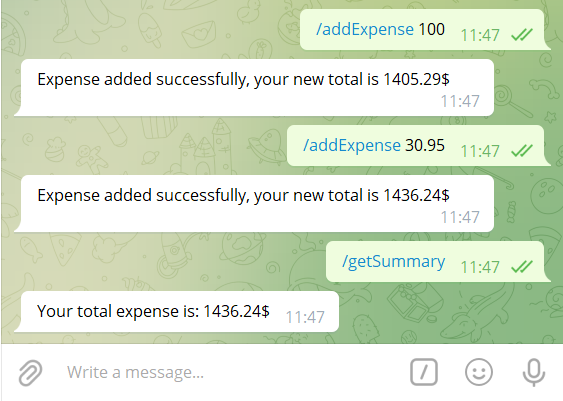
The actual function logic is implemented in ExpenseTrackerFunction class. Since the function we’re building will be triggered by HTTP requests, it extends com.google.cloud.function.HttpFunction The entrypoint for incoming requests is service method that together with request and response arguments looks similar to java HttpServlet. Our bot will support 2 commands: /addExpense that adds some amount to the user’s expenses and /getSummary that shows the current total amount. The logic of this class is simple enough — it reads the bot command from request body, updates the data stored in the database using repository class and sends the response back to the user using Telegram API (the cloud function itself does not write anything to the response)
The last class is TelegramService that incapsulates some logic related to communicating with Telegram API. It helps to parse Telegram Update object from incoming request and to send the response message back to the user. Note that Telegram bot token is fetched from environment variable.
Running function locally
As mentioned before, build.gradle file contains runFunction task that can be used to launch local server hosting our cloud function. Before executing the command we create a dummy environment variable with Telegram bot token (you can set the real token here if you want your local function instance to be able to send messages to Telegram API):
export BOT_TOKEN=56468746234536327
./gradlew runFunction
When you’ll see the following line in terminal output: INFO: URL: http://localhost:8080/ it means that the function is ready to process requests. We can launch another shell session and use curl to imitate incoming Telegram update request:
curl -X POST \
-H "Content-Type: application/json" \
-d '{"message":{"text":"/addExpense 100","from":{"id":23432456}}}' \
localhost:8080
This request contains a command to add 100$ expense to user with ID 23432456 . We can check if data was saved to the database making another request directly to the database (note the we’re using another gcloud command to generate database access token, without it request will not be permitted):
curl ${FIREBASE_URL}/summary/23432456.json?access_token=`gcloud auth application-default print-access-token`
The response should look like this: {“amountInCents”:10000}
Deploying function
In the final step of the tutorial we will deploy cloud function and wire it to the Telegram bot. The first can be done with gcloud beta functions deploy command. We’re using beta version of the command since exposing secret to a cloud function is a relatively new feature so it cannot be done with the normal version of the command. The following should be executed from the Gradle project root directory:
gcloud beta functions deploy expense-tracker-function \
--project=$GCLOUD_PROJECT_ID \
--entry-point org.expensetracker.ExpenseTrackerFunction \
--region=europe-west1 \
--allow-unauthenticated \
--memory=128mb \
--runtime=java11 \
--security-level=secure-always \
--service-account=$SERVICE_ACCOUNT_EMAIL \
--set-env-vars=FIREBASE_URL=$FIREBASE_URL \
--set-secrets=BOT_TOKEN=telegram-bot-token:latest \
--trigger-http
Here we specify some configuration for the function instance like amount of memory and java runtime, also setting FIREBASE_URL environment variable that is pointing to our Realtime Database instance and exposing Telegram bot token secret as BOT_TOKEN environment variable. The full explanation of the command arguments can be found here. After executing the command, source code will be submitted to Google Cloud Build which will in turn build the code, run tests and then deploy it as a new Cloud Function instance.
After a few minutes you should see lines similar to that in the output:
.......................................done.
...
httpsTrigger:
  securityLevel: SECURE_ALWAYS
  url: https://europe-west1-expense-tracker-330011.cloudfunctions.net/expense-tracker-handler
The url here is used to trigger the function execution. If you want to redeploy the function after adding some changes to the code, you can omit most of the parameters and use the following command:
gcloud functions deploy expense-tracker-function \
--project=$GCLOUD_PROJECT_ID \
--entry-point org.expensetracker.ExpenseTrackerFunction \
--region=europe-west1
Creating webhook
Now we need to configure Telegram bot to send incoming chat messages to new function. This can be done using webhooks feature. Do create a webhook, simply perform the following GET request (through curl or your browser), replacing placeholders:
https://api.telegram.org/bot[bot-token]/setWebhook?url=[cloud-function-url]
bot-tokenis the token you got from BotFathercloud-function-urlis trigger URL you received after deploying the function in the previous step
You should receive the following response:
{“ok”:true,”result”:true,”description”:”Webhook was set”}
After that your bot should be ready to process incoming requests. You can start the conversation with the bot in Telegram client and check it out.
You can also go to Firebase console and view/edit database content directly from your browser.
Ten articles before and after
TRX1 Dev Blog #11 (November 2021) – Telegram Group
Telegram Bot 跟我想的不一樣. 第一天進公司時,Slack就被邀進同事們訂便當的群組,在上面會宣布今天訂那一家便… – Telegram Group
How to Create a Telegram Chatbot in 2022 – Telegram Group
Google Sheets Formula & Telegram Message ✈️ – Telegram Group
Monitor Server with Telegram Bot and Python – Telegram Group
How To: Deploy Java Telegram Bot to Heroku – Telegram Group
How To: Create a Java Telegram Bot – Telegram Group
How I Use A Telegram Bot To Track My Expenses – Telegram Group
CryptoChat: Un chatbot hecho con rasa sobre criptomonedas – Telegram Group