How to Create Telegram Bot in Python
A step-by-step guide to deploying a bot locally that handles private and group messages

The topic for today is setting up your own bot in Telegram and deploying it locally via a method called polling. This means you can develop and test your bot in your server, as long as it is connected to the internet. https is not required for this, which allows you to kickstart your project right away. You can always scale your project later by configuring your server with https and linking it to Telegram via a webhook.
In this article, you will learn to:
- Handle different types of incoming messages from users
- Send messages directly to users
- Handle private and group messages
At the time of writing, there are a few different Python packages and interfaces for the Telegram Bot API. In this tutorial, I’m going to use a Python package called pyTelegramBotAPI. According to the official documentation, it is:
“… a simple, but extensible Python implementation for the Telegram Bot API.”
Let’s proceed to the first section and start installing the necessary modules.
1. Setup
Make sure you have installed Telegram on your phone. We’re going to create our bot directly inside Telegram by interacting with BotFather bot. This is the official bot created by Telegram to facilitate bot creation.
Searching BotFather
Open Telegram on your phone and click on the search button at the top right of the main interface. Then, type botfather in the search bar. You should see the following user interface.
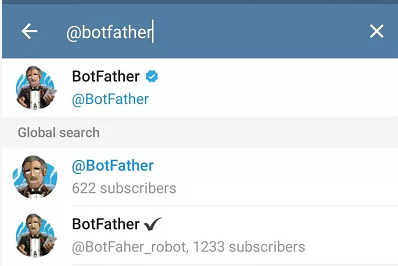
Click on the first selection which has the blue tick icon beside it. The icon represents VerifiedBadge, which indicates bots or reputable companies or persons approved by Telegram. You should see the following user interface:
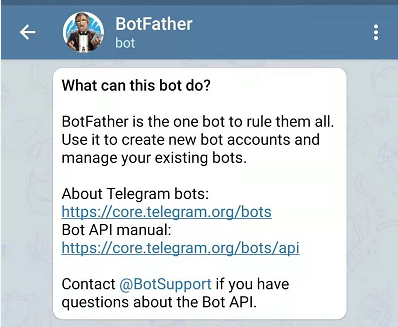
Interacting with BotFather
Click on the Start button and you should see a list of commands that you can use to interact with BotFather.

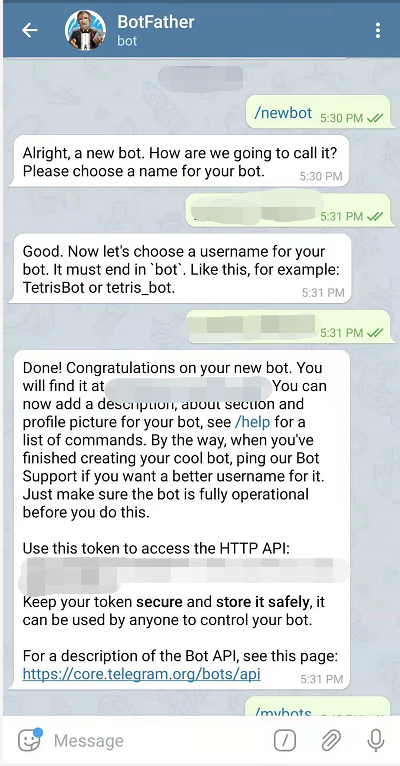
Send the following message to BotFather.
/newbot
You should see the following prompts which ask for the name and username of your bot.
name: The display name for your bot.username: The unique identifier across all the bots in telegram. You cannot use existing names that are already in the system. Also, it must end with bot post-fix. For example,TetrisBot, ortetris_bot.
To keep things simple, I usually use the same string for both name and username. A new token will be generated for you to access the HTTP API. Make sure to keep it secure to prevent other people from using it to control your bot.
Privacy in group chat
If you intend to use your bot inside a Telegram group, you need to understand how privacy works in Telegram. By default, the bot will not receive all the messages in a group chat. Based on the official documentation, it will only receive:
- Command messages that start with a slash
/symbol (e.g./help). - Replies to messages sent by your bot.
- Service messages (addition or removal of people from the group).
- Messages from channels in which the bot is a member.
Generally, Telegram recommends using commands for interacting with bots. In the event where there are multiple bots in the same group, you can post-fix their usernames at the back of each command to prevent confusion. Please note that you need to process and handle it on your own in your server:
/help@your_bot_username
In the latest version, the @ symbol can be used when creating inline bots — where users can interact with your bot via inline queries without sending a message. However, one major downside is that you will lose the flexibility to provide any dynamic input, like this:
@your_bot_username check_phone_status 012345678
Configuring bot to access all messages in group chat
You may prefer to use the old convention, where the bot only responds when it’s tagged with the @ symbol:
@your_bot_username hello there
If so, you need to turn off the group privacy setting or make it as an admin (not recommended) to allow it to access all messages.
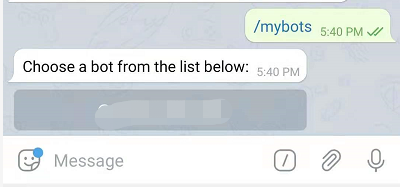
To do so, send the following message to BotFather:
/mybots
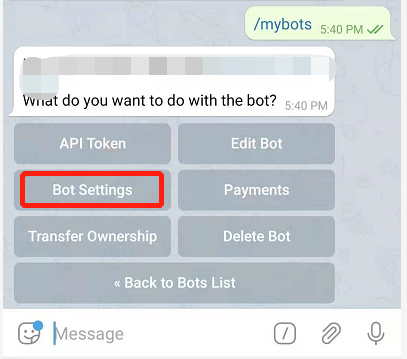
It will list out all the bots that you have. Since I have only created one bot, only one selection is available.
Click on the desired bot to reveal more options as follows. Continue by tapping the Bot Settings.
You should see a few options related to the group. Click on the Group Privacy button.
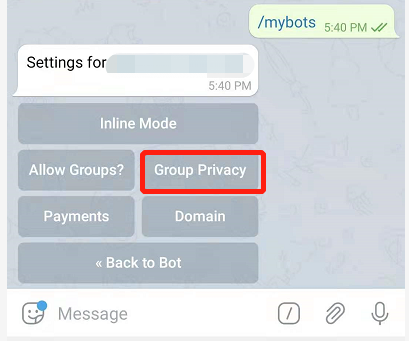
Disable the group privacy setting by clicking on the Turn off button. Your bot will now have access to messages sent in group chats. If your bot is already in a group, the new changes might not be reflected or propagated. If you experience an issue with it, just remove it from the group and add it back to the group again.
Adding a bot to group chat
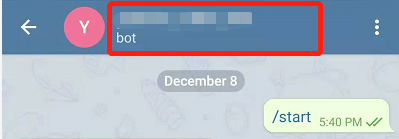
There are quite a few ways to add a bot to group chat. The easiest method is to just do it directly from Telegram. Search for your bot and click on the Start button to initiate a conversation with it. Next, click the name of the bot which is located at the top bar.
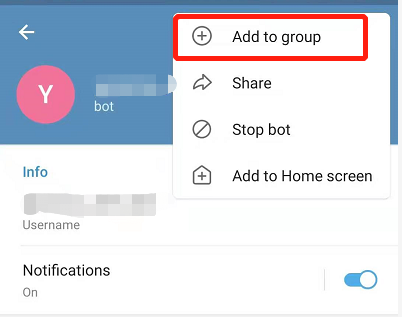
You should see the following interface. Continue by clicking on the triple dots at the top right of the interface.
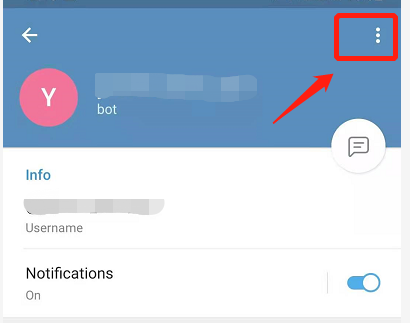
A popup will appear with the following options. Tap the Add to group selection.
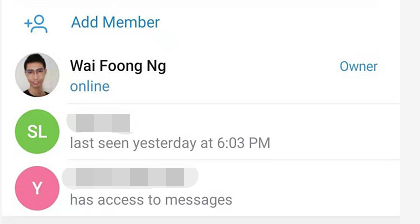
Select the desired group and confirm the addition. Head back to the group and check the setting to make sure that your bot has access to group messages.
Installing Python packages
We’re done with the Telegram setup, now let’s install the required Python packages for this tutorial. Before that, make sure you’ve created a virtual environment. Activate it and run the following command in your terminal.
pip install pyTelegramBotAPI
You can easily verify if you have installed the package by running the following:
pip show pytelegrambotapi
The following text will be output to the console:

Once you have finished the installation, move to the next section and start writing Python code.
2. Implementation
Create a new Python file in your working directory. For simplicity, I’m going to name it testbot.py (modify the name accordingly).
Importing the module
Add the following import statement at the top of the file:
import telebot
Instantiating a new instance
Instantiate a new TeleBot instance by passing in the Telegram token that we created earlier:
bot = telebot.TeleBot("YOUR_TOKEN_HERE")
Formatting text
By default, parse_mode is set to None, so the text will be sent as it is. If you prefer to have basic formatting features — such as bold, italics, and underline — you can specify this while creating the TeleBot instance.
HTML: Formatting based on HTML.MarkdownV2: Formatting based on Markdown.
bot = telebot.TeleBot("YOUR_TOKEN_HERE", parse_mode="MarkdownV2")
Please be noted that you cannot combine both types of formatting in your messages. Setting the parse_mode during instance creation will propagate the formatting to all returned responses. Should a need to send messages with different formatting arise, it’s recommended to set it to None during instance creation and pass the parse_mode parameter when sending individual messages.
In this tutorial, I’m using the default parse_mode None. Feel free to experiment.
Handling incoming messages
Let’s create a new message handler which represents a set of filters for incoming messages. If a message passes the filter, it will call the decorated functions with the original message as the parameter. At the time of writing, it comes with the following filters:
commands: ReturnsTrueifmessage.content_typeistextandmessage.text: Starts with any of the strings present in the predefined list.func: Based on the result returned from thelambdafunction.content_types: ReturnsTrueifmessage.content_typeis in the predefined list.regexp: ReturnsTrueifmessage.content_typeistextandre.search(regexp_args)isTrue.
Here is a simple message handler that handles /start commands. /start will be called automatically when a user interacts with the bot for the first time after clicking on the Start button. Commands refer to messages that start with the / sign.
@bot.message_handler(commands=['start'])
def handle_command(message):
    bot.reply_to(message, "Hello, welcome to Telegram Bot!")
Continue by adding another message handler that instead uses the func filter below the code. You can define your own lambda function in which messages will be handled by this decorated function as it is passed the criteria. I’m going to set the return as True since I want to handle all incoming messages.
Then, call the reply_to function which accepts two parameters:
- A
Messageobject which represents a message. It contains quite a lot of information such asmessage_id,date,text, etc. You can simply pass the input message variable. - A string represents the returned message from the bot.
Let’s set it to message.text to echo the same text back to the user.
@bot.message_handler(func=lambda message: True)
def handle_all_message(message):
    bot.reply_to(message, message.text)
Please note that message handlers are tested based on the order that they’re declared. A bot will return a response from the first matching message handler. Be sure to place message handlers with high priority, such as commands, at the top of the order.
Polling
Now, let’s add a final touch to our file with the following code:
bot.polling()
polling creates a new thread that calls an internal function to retrieve updates automatically and pass the messages to your message handlers.
It’s a blocking function which means that codes below it will not be executed. Make sure to place it at the end of your file. Also, do not call it more than once, or an error will occur. If you are looking to scale your project, use a webhook instead. Running multiple polling servers will not work!
The polling function accepts the following parameters:
none_stop: A boolean to determine if polling should stop when an error occurred. The default value is False.interval: An integer represents the interval between polling requests. By default, it is set to 0. Setting it to any other value higher than 0 will affect the response timetimeout: The timeout in seconds for long polling. The default value is 20.
You can find the complete code in the following Gist:
Running Your Server
Make sure the terminal is now pointing at the working directory where your Python file is located. Make sure that your machine is connected to the internet. Run the following command to start polling, modifying the name as required:
python testbot.py
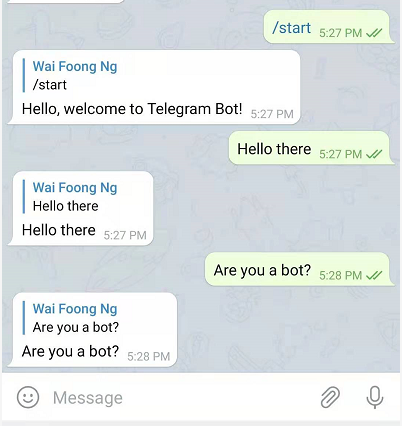
Head back to Telegram and start chatting with your bot. You should get a reply whenever you send a message privately, or in a group where your bot is a member:
Differentiating Private and Group Messages
You can easily distinguish private incoming messages from group ones by checking the message.chat.type variable. The available options are as follows:
- Private
- Group
- Supergroup
- Channel
Let’s modify the handle_all_message functions with the following control flow:
@bot.message_handler(func=lambda message: True)
def handle_all_message(message):
    if message.chat.type == "private":
        bot.reply_to(message, message.text)
    elif message.chat.type == "group":
        bot.reply_to(message, "Hello to all!")
Re-run your polling service again and you should get a different response when sending a message to a group.
Replying Only When Tagged
Now, we have a new problem: Our bot will respond to every single message in the chat if you have set it to be admin or have disabled the privacy setting. In order to resolve this, set another condition that limits the reply if and only if the bot is tagged in the message. Replace username_of_your_bot with the username that you’ve set:
@bot.message_handler(func=lambda message: True)
def handle_all_message(message):
    if message.chat.type == "private":
        bot.reply_to(message, message.text)
    elif message.chat.type == "group":
        if('@username_of_your_bot' in message.text):
            bot.reply_to(message, "Hello to all!")
Handling Other Content Types
For now, our bot is only capable of replying to text messages. It will not work properly when the users send a file or sticker. You can create a new message handler and specify the accepted content_types in a list. The following code illustrates how you can echo the same sticker back to users:
@bot.message_handler(content_types=['sticker'])
def handle_sticker(message):
    bot.send_sticker(message.chat.id, message.sticker.file_id)
Please note that I’m using the send_sticker function instead of reply_to. This is simply because reply_to is just a convenient function that calls send_message internally. Check the official documentation for the complete list of all the available content_types and its corresponding functions.
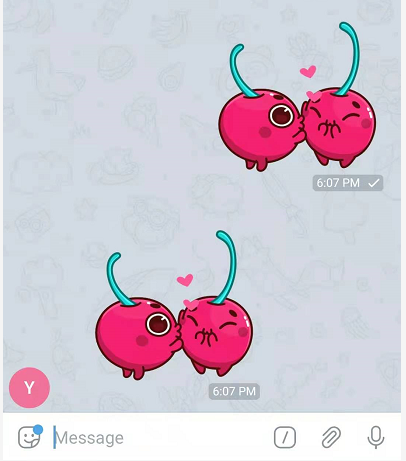
Re-run your server and you should see the something like this when you send a sticker to your bot:
Conclusion
Congratulations on completing this tutorial! Let’s recap what we’ve learned today.
We started off with creating our bot in Telegram by interacting with BotFather. We also created a new virtual environment and installed the pyTelegramBotAPI package in it.
After that, we moved on to instantiate a new TeleBot instance based on the token that we obtained early from the bot creation. We implemented a few message handlers to handle commands and all the incoming messages.
Apart from that, we also learned to distinguish between private and group messages. We can easily handle stickers by specifying the accepted content_types in our message handlers.
By now, you should be able to create your own Telegram bot locally in your machine, as long as it’s connected to the internet.
Thanks for reading this article — I hope to see you again in the next one!
References
- Github — pyTelegramBotAPI
- Telegram Bot API
- StackOverflow — How to add a bot to a Telegram Group
- StackOverflow — Allow bot to access Telegram Group Message
Ten articles before and after
Telegram Basics. Explaining some end-user concepts of… – Best Telegram
$10,000 Anypad Telegram Referral Competition – Best Telegram
Telegram and The Future of Mobile Messaging – Best Telegram
Bee Token Hits 50k on Telegram! Community Update Jan 21, 2018 – Best Telegram
Building a chat bot using Nest.js and Telegram – Best Telegram
O WhatsApp ficou mais seguro que o Telegram? – Best Telegram
Introducing The Unbound Telegram Ambassador Program – Best Telegram
Infomatix Telegram Sticker Contest – Best Telegram
How does Telegram members count impact the ICO investment returns? – Best Telegram